Technical Tuesday: How To Bleed Your Avid Elixir Brakes
Read on...
Bleeding your brakes is not something that you should have to do often, but when the time comes it is important to know exactly how to do it correctly. One small mistake can introduce air into the system and mean that you'll have to begin the process all over again at best, or suffer from mushy brakes that could be down on power. With the right technique and tools it can be a relatively quick and simple job that most home mechanics should be able to handle. Below you'll find a great video and step by step instructions on how to bleed your Avid Elixirs correctly. If you do not have the correct tools or are are not confident in your ability to perform this job you should take it to your local bike shop.
Step by Step Avid Elixir Bleed Instructions:
Tools needed: Avid bleed kit (syringes, drip free fittings, DOT fluid, torx tool, bleed block), T25 and T10 torx (included in Avid bleed kit) , 2.5 mm allen key, toe strap or elastic band, rags, water or isopropyl alcohol in a spray bottle.
1.The first thing you'll have to do is prepare the syringes. Lubricate both syringe plungers with DOT fluid to create a better seal and make them easier to stroke. Thread Avid drip free bleed fittings onto both and fill one a third full with DOT fluid. If there are any large air bubbles you'll have to push them out of the fluid. Using a shop towel to keep from dripping, hold the syringe upright and depress the plunger until the bubble has exited through the bleed fitting. Now close the clip on the bleed fitting. You are now going to get the last bits of air out of the fluid by degassing it. With the clip still closed and the plunger upright, pull back (out) on the plunger to expand the small air bubbles in the fluid. Be careful not to pull too hard or you'll let air in through the backside of the plunger. Repeat if necessary until little or no air bubbles are present. Remove the large bubble again by opening the clip and pushing it out the top. Close the clip when done.
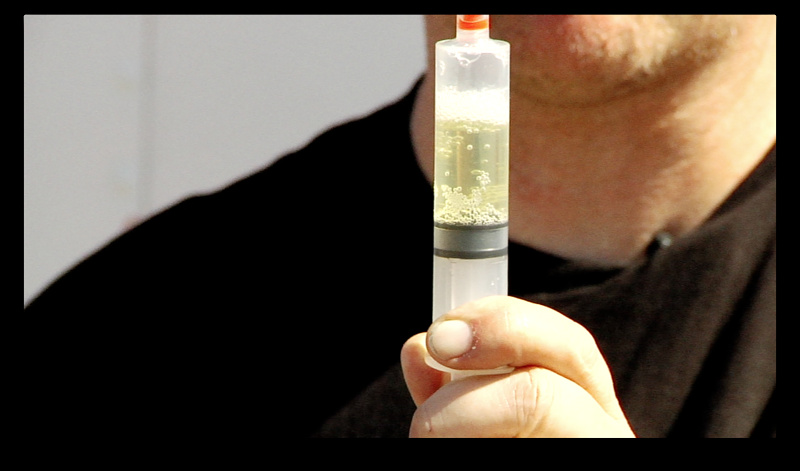 |
| Degassing the fluid |
2. Fill the second syringe only about 1/8 full. Remove the large bubble that is there from filling it, but there is no need to degas the fluid as it won't be introduced into the system. Close the clip when done.
3. If the brake is on your bike remove the wheel and take out the brake pads. Put the caliper thru-bolt,safety clip, and the brake pads in a safe spot where they won't get lost or be exposed to brake fluid. Insert the Avid bleed block in from the top, thick end down. This will keep the pistons from being pushed out as you bleed the brake.
 |
| Installing the Avid bleed block |
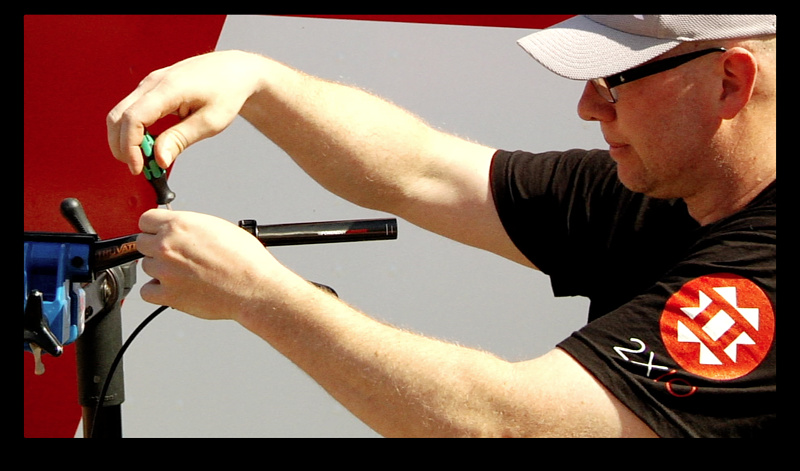
4. Use your T10 torx driver (one comes in the Avid bleed kit, or you can use a separate one) to remove the bleed port screw that is located up at the lever on the bite point adjustment dial. It's small so put it in a safe spot so it doesn't roll away. Making sure that the fluid is pushed right up to the end of the bleed fitting and screw your 1/8 full syringe directly into the bleed port. Now remove the bleed port screw for the caliper (you can find it at the center of the banjo bolt) and install your 1/3 full degassed syringe, making sure that the fluid is pushed up right to the tip of the bleed fitting. You're now ready to start bleeding the brake.
 |
| Removing the bleed port screw at the lever |
5. Open the bleed clip at the lever first, followed by the one at the caliper. You are now going to bleed the brake line by moving fluid from the caliper syringe up to the lever syringe. While holding the lever syringe upright, push one third of the fluid from the caliper syringe up to the lever. As you do this the lever syringe will being to fill.
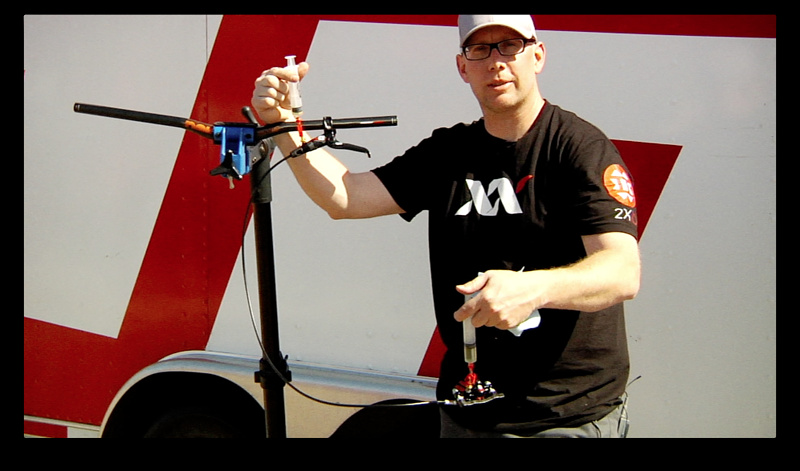 |
| Pushing the fluid through the brake line |
6. Now you are going to bleed the caliper. Use your toe strap or elastic band to pull the brake lever fully to the handlebar. This isolates the caliper from the rest of the system. With the bleed clip open, apply light pressure to the plunger to shrink any air bubbles that are in the system in order to make it easier for them to escape. Now pull back (out) on the plunger to draw out the air bubbles. Again, pull hard enough to extract the bubbles, but not hard enough to break the seal on the plunger. Repeat the process until you are no longer able to pull any bubbles out of the caliper.
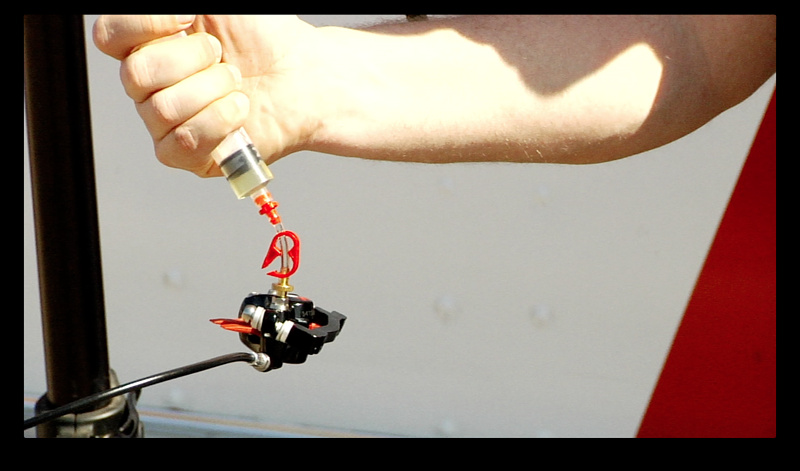 |
| Bleeding the caliper |
7. Remove the toe strap or elastic band at the lever, but use your hand to keep holding it closed. Apply pressure to the caliper syringe and at the same time slowly let the brake lever come out. You should feel slight pressure at the lever as you push on the caliper syringe. Take care to release the brake lever slowly (be sure to watch the video to see how it's done). Now close the bleed clip at the lever.
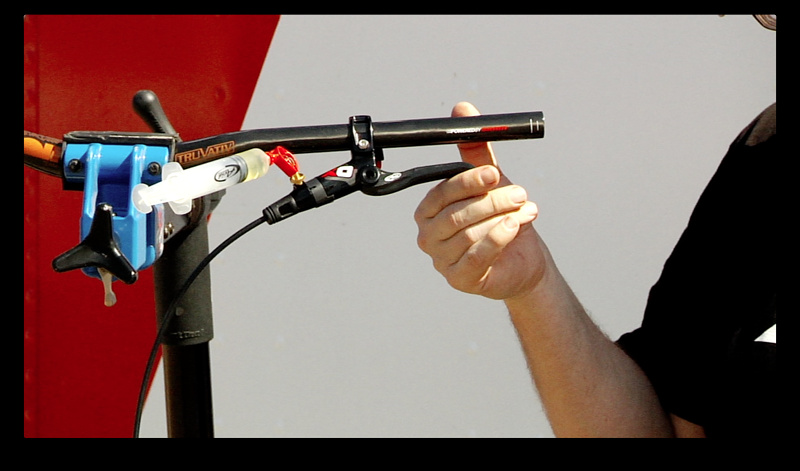 |
| Releasing the lever slowly |
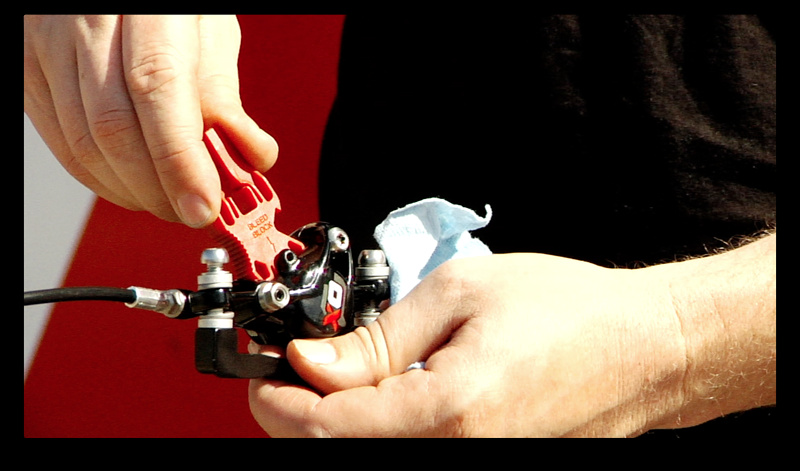
8. You are now going to remove the syringe from the caliper. Use a rag to keep any drips in check and unscrew the bleed fitting from the caliper. You should see fluid topped up right to the face of the bleed port. If you don't you may need to re-bleed the caliper. Install the bleed port screw and wipe off any excess DOT fluid after you've sprayed the caliper down with either water or isopropyl alcohol.
9. Be sure that the pad contact adjuster is threaded fully up against the body (all the way in) before bleeding the master cylinder. Open the bleed clip and bleed the lever just as you did the caliper. Apply slight pressure to shrink any air bubbles, followed by pulling out on the plunger to draw the bubbles out. There are two quick tips you can do to help remove any bubbles in the system: gently tapping the line and lever with the handle of a screw driver can knock bubbles free, as can flicking the brake lever slightly to release any air that is clinging to the piston. When this is done once again apply pressure to the syringe and then pull back. Repeat the process until you can no longer pull any air out of the system.
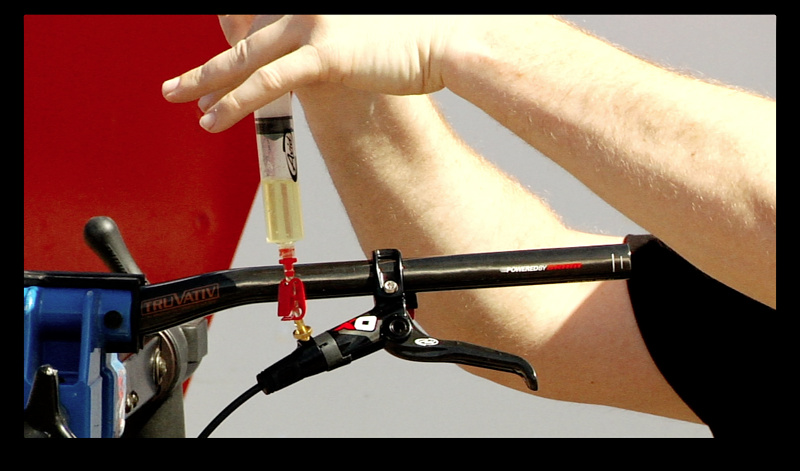 |
| Removing air from the lever/master cylinder |
10. You can test your lever throw by applying a slight amount of pressure to the lever syringe and pulling gently on the brake lever. The lever should feel firm as well. Close bleed clip and remove syringe. Again, you should see fluid topped up to the top of the bleed port. Install the bleed port screw and clean the lever using a rag and cleaning agent. Take a minute to check the brake by pulling hard on the lever (be sure to still have the bleed block in place) and watching for any fluid at the lever and caliper hose fittings. When you're sure that the caliper is clean and free of any DOT fluid reinstall the pads and retaining bolt and clip.
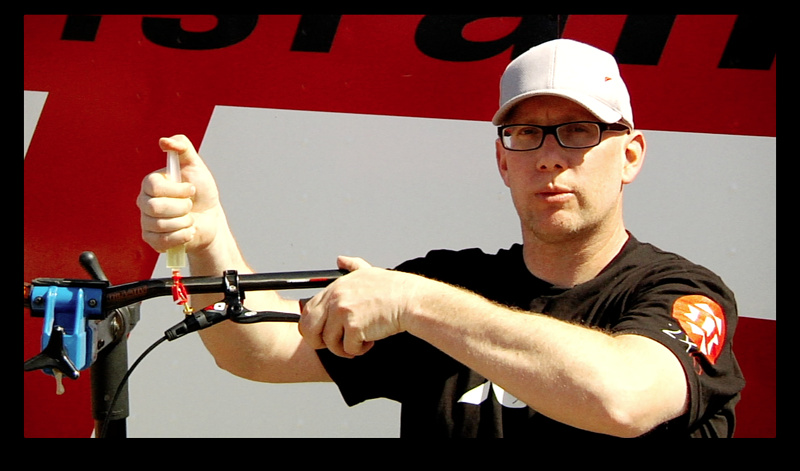 |
| Testing the system |
As with any job, be sure to check your mechanical work before hitting the trails. Besides ruining a ride, not having your brakes bled properly can be dangerous and certainly cause injury. Do a number of test stops to positive that there is no air in the system and that your brake pads have not been contaminated with DOT fluid. If you are not 100% confident in your work, take it to your local shop to have them double check.
Technical Tuesday #1 - How to change a tube.
Technical Tuesday #2 - How to set up your SRAM rear derailleur
Technical Tuesday #3 - How to remove and install pedals
 What next