Technical Tuesday: How To Set Up Your SRAM Rear Derailleur
by Mike Levy
For the second installment of Technical Tuesdays we take a close look at how to setup your SRAM X9 rear derailleur. Don't feel left out if you don't run a SRAM derailleur, as many of the same steps still apply. Inside you'll find step by step instructions and a How-To video that will guide you through the process.
Read on...
How a rear derailleur works is a mystery to a lot of riders, and it's easy to be intimidated by it. One day it could be working perfectly and the next it will have a mind of its own. You take it to your local shop only to have the grumpy wrench wheel it into the back to perform three minutes of voodoo that is apparently a trade secret. He could be making adjustments or he may be sprinkling unicorn droppings on it, who knows? The truth is it's actually a pretty simple job that only requires a couple of tools and some patience to get right. Below you'll find step by step instructions on how to setup your SRAM X9 rear derailleur.
Keep in mind that the same basic principles will apply to other makes and models, although you may find the adjustments in different places.
Step By Step SRAM Derailleur Setup Instructions
Tools needed: Folding allen key set (or separate 3 mm and 5 mm allen keys), Phillips or flat head screwdriver .
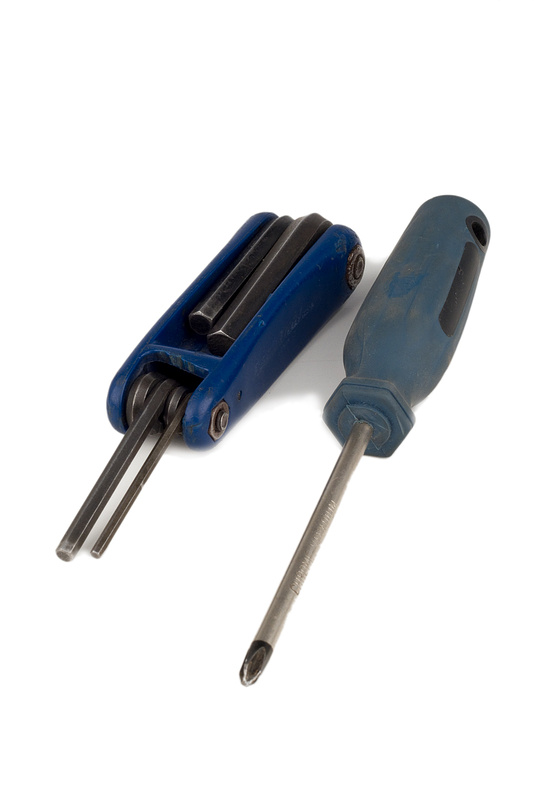 |
| All you need is a folding allen key set and a screw driver |
Before you begin adjusting things it is important to be sure that all of your shifting components are in good working order. You could spend the next hour following these instructions, but it will be of no use if you're using bent, damaged, or worn out parts. Take a few minutes to be sure that both your derailleur and derailleur hanger are straight. Do this by standing directly behind your bike and sighting up through your derailleur, everything should be straight and in line. Also, your chain should not be completely worn out and dry, as this will have a detrimental effect on your shifting as well. Likewise, if your cable is rusty and not moving free, all your efforts will be wasted. Once you're happy that everything is in good condition move on to the steps below.
You'll be adjusting three settings during this process: cable tension, limit screws, and B-tension.
Cable Tension
It is exactly as it sounds. The amount of tension on the shift cable controls how much the derailleur moves with each click of the shifter. Too much tension and it will shift past the correct cog as you shift to an easier gear, as well as shift slow in the opposite direction. Too little tension and it will shift slow, or not at all, to a bigger cog, and move too far as you come down to a harder gear. The correct amount of cable tension is a balance that moves the chain up and down over your cassette at just the right amount.
Limit Screws
Think of your limit screws as your derailleur's adjustable stops. They only effect the amount that the derailleur is allowed to move at each extreme of its travel. There are two limit screws, one for the low range (
easiest gearing) and one for the high range (
hardest gearing), and are labeled accordingly with "H" being for High and "L" for low. The further you dial in the "high" limit screw, the less range your derailleur will have at the high range. If you find that your derailleur is shifting over the top of the largest cog, you'll need to apply more "low" limit until it no longer over shifts. If your shifting is good throughout the middle of your cassette, but is not able to shift to the largest cog, you may have dialed in too much limit. The same applies to the high limit adjustment. If you manage to bend your derailleur or derailleur hanger after you make these adjustments, they will no longer be effective.
B Tension Screw
This lesser known screw adjusts how close the derailleur's upper pulley wheel follows the cassette. If it is too close, the upper pulley and chain will come in contact with the cassette, especially when back pedaling. Too far away and your shifting will be slower than you may like. Certain derailleurs will need more B Tension screw applied to keep them from bumping on large 32 or 34 tooth cogs found on some mountain bike cassettes.
1. For this process we are going to start from scratch. If your shifting is only slightly out of adjustment you may not need to start from the very beginning. Begin by shifting your SRAM rear derailleur to the smallest cog (
least amount of cable tension) and then undo the derailleur's cable anchor bolt in order to release all cable tension. The cable should now be free and have no effect on the shifting. Take note of where the shift cable is clamped in relation to the bolt before you loosen it. Is there a channel or groove where the cable is intended to be clamped? You'll need to know this when the time comes to re clamp the cable.
 |
| Chain on the smallest cog and cable anchor bolt undone |
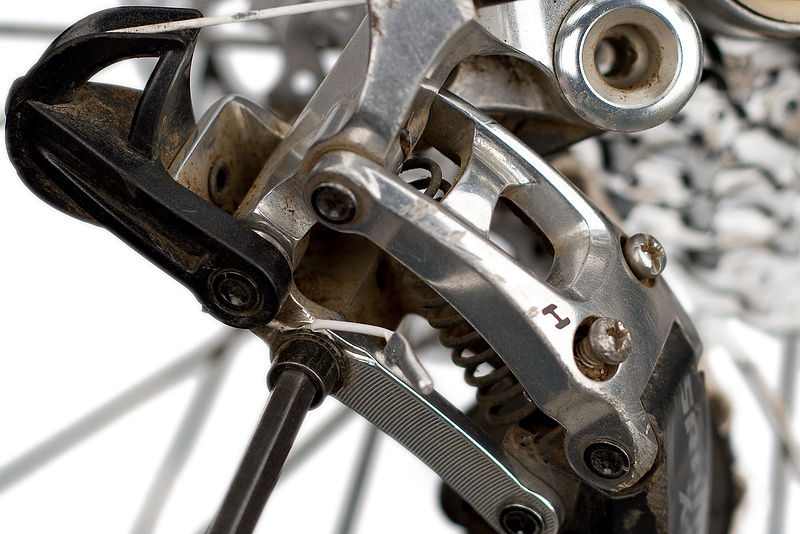
2. We are going to start by setting the high limit screw to the correct position. This is an important step as some of your other adjustments will be affected by this as well. If your high limit is off, there is a good chance the rest of your adjustments will be as well. To do this, manually move the derailleur with your hand by pushing on the knuckle (
not the cage!) and moving the chain up the cassette just as you would if you were shifting to an easier gear. Next, slowly release it and let it come down under it's own spring tension. It should move the chain onto the smallest cog with no hesitation, but at the same time it should not let it go past the cog and and make contact with the frame. Sight from directly behind the smallest cog, the upper pulley wheel and chain should be directly in line with the teeth for the cog.
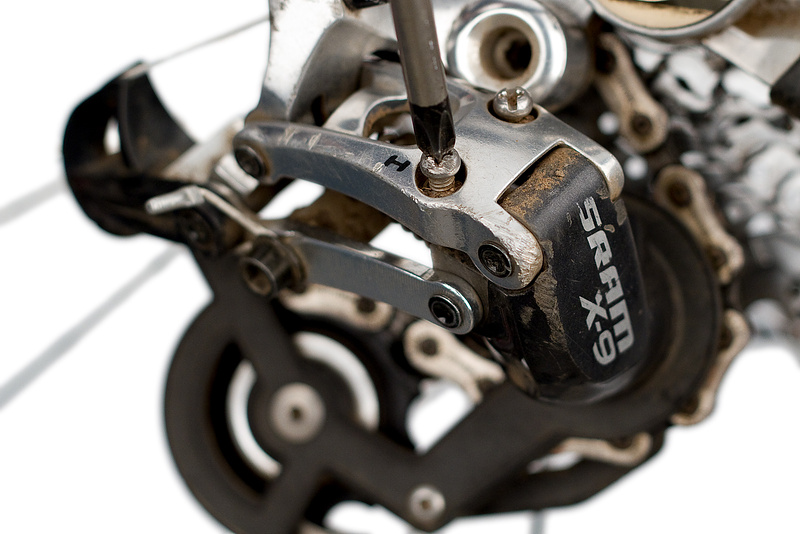 |
| Setting the high limit adjustment |
3. If it is shifting too far and the chain and upper pulley wheel are not lined up with the small cog, or the chain is coming right off and making contact with the frame, you'll need to add more high limit. Turn the high limit screw clockwise half a turn or less and then recheck. Likewise, if the chain is not coming down onto the smallest cog, or hesitating slightly before it does, you'll need to dial out the high limit screw a small amount to let the derailleur have more range.
4. The next step is to correctly adjust your derailleur's low limit screw. This adjustment keeps your rear derailleur from shifting the chain up and over the largest cog and into the spokes. With the shift cable still loose and not clamped down, push gently on the derailleur body (
not the cage!) in order to move the chain up to the largest cog just as it would if you were shifting to an easier gear. Do this slowly as if your low limit is not adjusted correctly it will over shift and possibly damage your drive side spokes. You should be able to push the the derailleur body until the chain is on the largest cog. If it doesn't have enough free movement to reach the largest cog, or is doing it slowly, you'll need to dial out the low limit screw by turning it counter clockwise a small amount. If it moves the chain up and over the cog and into the spokes, you'll need to add more low limit by turning the screw clockwise. You should be able to move the derailleur and chain up to the largest cog and feel a firm stop. Again, when sighting from behind, the upper pulley wheel and chain should be directly lined up with the teeth on the largest cog.
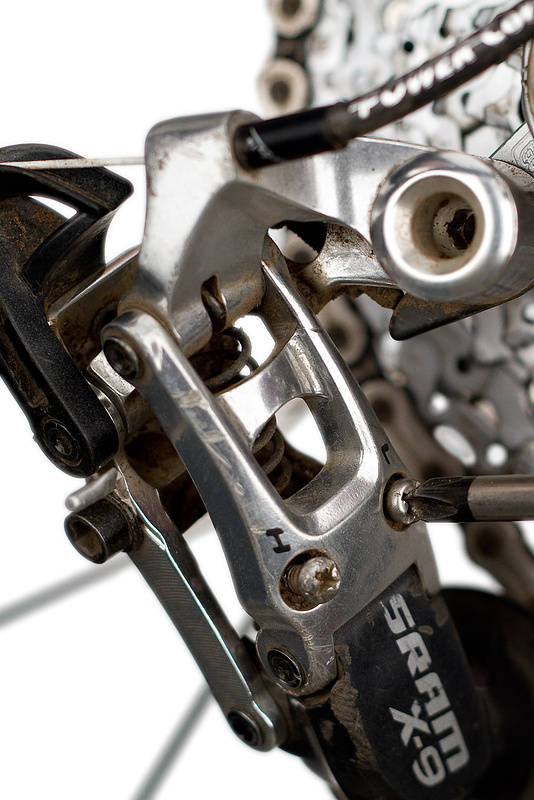 |
| Setting the low limit adjustment |
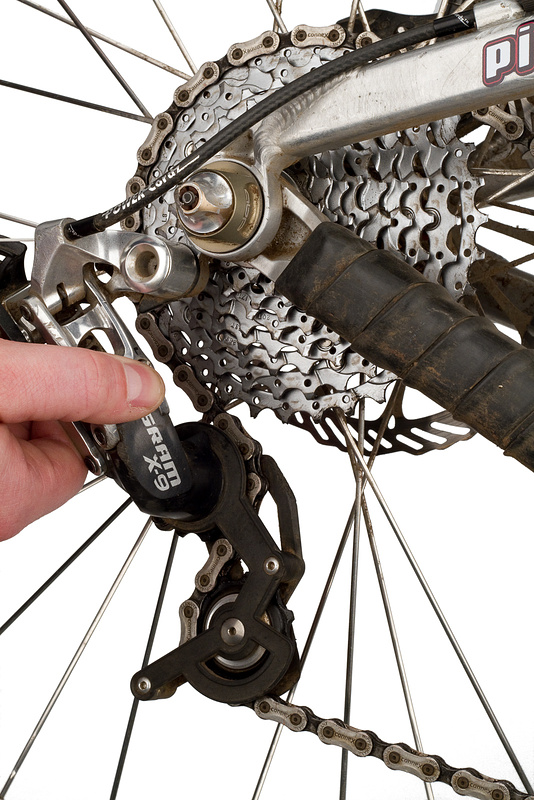 |
| Checking the low limit adjustment by hand |
5. Now it is time to re clamp your shift cable, but first you should make sure that it is moving free through your shift housing. To do this shift as if you were shifting to the largest cog/easiest gear. Now hold onto the cable end with your hand and shift back down one click at a time. The cable should move freely and not bind at any point. If it does you'll need to replace your cable before continuing. If you are happy with it then move on to the next step.
6. It is very important to make sure that the derailleur and chain are in the smallest cog/hardest gear position before you re clamp your shift cable. Also, be sure to take note of where exactly the cable is supposed to be clamped. Certain models of derailleurs may need to have the cable clamped in different positions. Have a close look and you should be able to see a channel or knurled surface that defines the clamping area. If you position the cable in the wrong spot it will not shift correctly as the cable pull ratio will be off. Before clamping the cable, have the barrel adjuster at the shifter dialed two turns out from full in. With the derailleur in this position, pull the shift cable snug with your hand and clamp it in the correct position under the cable anchor bolt. When doing this be sure to pull all of the slack out of the cable. With practice you'll be able to know just how hard to tug on the cable so that you won't have to make drastic, if any, tension adjustments after it's clamped.
 |
| Re clamp the shift cable with the chain on the smallest cog |
7. Now you're ready to check your shifting and see if any adjustments are needed. While pedaling shift the rear derailleur up one gear at a time towards the largest cog/easiest gear. If it's adjusted correctly, one click of the shifter will move the chain up to the next cog without hesitation and without it over shifting to the next cog. When checking your shifting be sure to shift one gear at a time as it can become confusing if it's out of adjustment and you're doing multiple jumps. The first couple of tries may result in not enough tension, with the symptom being that the derailleur is not able to move enough to bring the chain up to the next largest cog. If this is the case, you'll need to add more tension by dialing the barrel adjuster at the shifter out/counter clockwise. Only turn this adjuster 1/8 to 1/4 turn at each go and then recheck. If you find that it is over shifting and moving the chain too far, you'll need to remove some tension. Do this by dialing the barrel adjuster in/clockwise 1/8 to 1/4 turn and then recheck. Another technique to fine tune your shifting is simply to listen to it. A rear derailleur that is out of adjustment will "tick tick tick" as you pedal, while a properly adjusted one should be nearly silent.
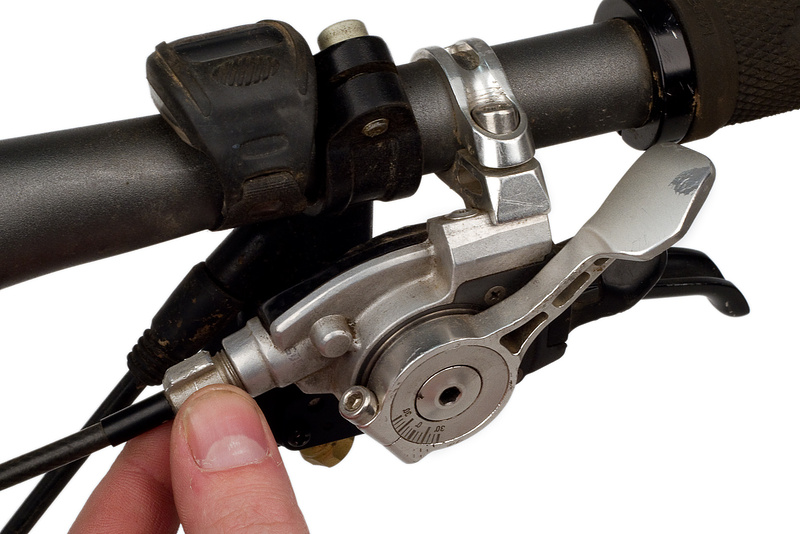 |
| There is no barrel adjuster on the derailleur, but one can be found up at the shifter |
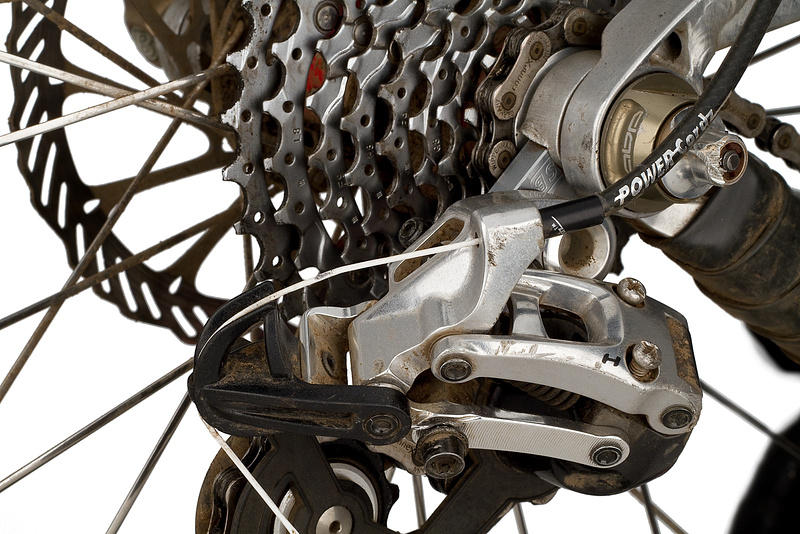
8. Before taking your bike off the stand the last thing to check is the B-Tension screw adjustment. To check this, shift your bike to the largest cog/easiest gear, and pedal forwards and in reverse. The derailleur's upper pulley and chain should not come in contact with the large cog, but be roughly within 5-6 mm of it. If you find that it is rubbing you'll need to add more B-Tension, do this by dialing the screw in/clockwise three to four turns. If it is too far away, your shifting may be slower than it needs to be. If it is too close you could damage the upper pulley wheel as well as not be able to pedal backwards or freewheel correctly.
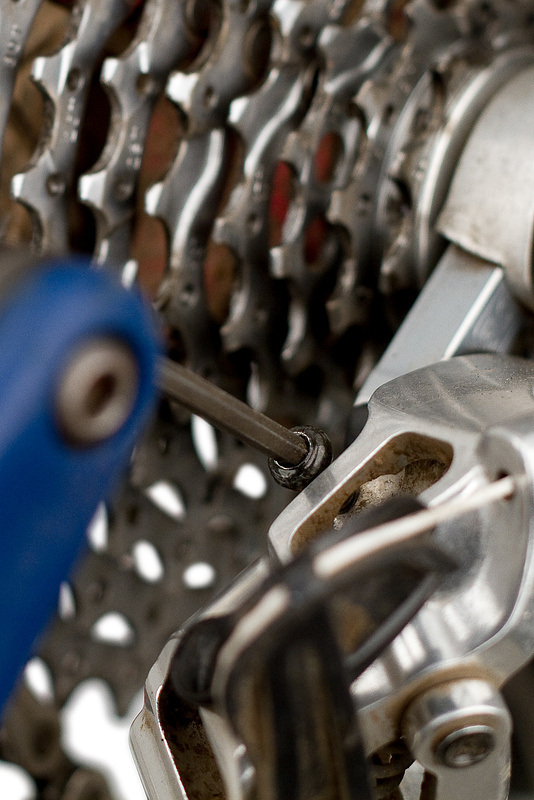 |
| Fine tuning the B-tension adjustment |
9. Once you are happy with how your bike is shifting while on the rack be sure to take it for a spin outside before heading up to the mountain. The drive train may react differently during riding because it is under far more load when pedaling with your legs than it was in the rack. You may need to make further adjustments to have it perform optimally, but by using the steps above you should be able to dial it in to perfection.